That’s What She Said… or Made. Embroidery!

“I’m running away from my responsibilities and it feels good.” – Michael Scott

I love The Office. I also love embroidery. I also also love running away from my responsibilities. I decided to bring all of these things together to make The Office themed embroidery. It’s been a fun project to do on the side of all of my other projects (and work). Here are some that I’ve made.

Alongside my The Office themed embroidery, I’ve made a few other ones for friends.

Embroidery has definitely grown into being one of my favorite crafts. I’ll keep you updated as I make more.

Advertisement

I keep that thang (crochet hook) on me.

I began crocheting in 2011 when I gave up knitting. I learned how to crochet on YouTube and my first project was a gigantic blanket that I made while working an answering service job. Since then I have crocheted blankets, scarves, hats, baby shoes, stuffed animals, dolls, tiny food, and clothes. The thing I love the most about crocheting is that it is fast and super stress relieving. I would suggest it to anyone who has some anxiety that they need to work through, or I guess to anyone who is just bored in the house (and in the house bored). Below I want to share some of the things that I’ve made over the past year:

The most recent thing that I made is this multicolor granny square throw blanket. I initially started it last year when I just mindlessly crocheted a bunch of granny squares while I was writing. I found the bag of these random squares while I was packing up to leave Minneapolis to come home to Cleveland to ride out the pandemic. I don’t know how you’ve dealt with what feels like the end of the world, but I needed something to do to ease the stress I’ve been feeling. So I decided to supplement the random squares that I had with more squares and to make them into a blanket. The project was especially fun because I learned how to do a continuous join to connect the squares. I am 100% going to be doing that again.

Here are some of the other things that I’ve whipped up over the past year:

Quilts, Quilts, Quilts!

As you saw in some of my previous posts, I’ve been working on quilting. I haven’t had much time (or patience) to make many quilts over the past year. The few that I have had a chance to work on have been super fun, though! I had the chance to make a quilt for my niece and a t-shirt quilt out of sorority t-shirts.

My t-shirt quilt was super fun to make. It gave me a chance to do something with many of my sorority t-shirts (most of which I can no longer fit). Making it was super simple. I just cut all of the t-shirts into blocks of the same size and sewed them together. From there I attached the binding and the fabric for the back of the quilt. This was also my first time binding a quilt. The binding was my least favorite part because it was filled with my least favorite thing: ironing. But, I got through it.

The second quilt that I made was one for my niece, Avery. A few years ago I made Avery the quilt featured in one of my first quilting posts. She has totally outgrown that quilt and had been reminding me that I needed to make her a new one for her big girl bed. So I got together some fabric and decided to try out a chevron pattern for the quilt and a really cute fox pattern for the other side.

Let me start describing making this quilt by saying that I will never ever ever again make a chevron pattern for a quilt. It sounded like a really great idea at the outset, but I very quickly regretted it (but I was in too deep). Also, I’m sure that you noticed that the bottom of the quilt is a different color than the beginning. I ran out of the blue color that I had been using and when I went to get more, there was no more of that type of blue at Joann Fabrics. By that point, Christmas was rapidly approaching and I had a promise to make good on – so I had to go with what I could find. Luckily I got it finished the night before Christmas and Avery LOVED it. She sleeps with it in her bed. I can’t tell you how happy I am that she likes it!

It’s a Great Day to be B(l)ack on the Moon

Hey y’all, hey! I fell off updating the blog for basically a whole year, but I’m back again. So much has gone on over the past year and between teaching and writing I did find time to craft, but I didn’t find the time to tell y’all about it. So I think I’m going to break my projects up into a few different posts, so it’s not too overwhelming. I plan to be more present here with the blog and I plan to continue to craft because with the world being the way that it is right now, crafting is one of the only things keeping me grounded.

Ya Girl Made a Handbag, Y’all.

36338116_10100314277897037_6830667952644161536_n


I’ve been talking about making a purse for a while now. After my last foray with leather/faux leather (that ended in a fold-over clutch), I was a bit disheartened about the prospect of making a bag. However, after spending a few months looking at patterns and examples on Pinterest, I built up some confidence. I found a really nice pattern from Riva la Diva for a DIY Céline Inspired Oversized Tote. It looked simple enough, so I decided to go for it.

The first thing I did was gather my materials. I got a yard of marine vinyl in black and a 1/2 yard of cotton upholstery fabric. I caught some REALLY good sales and got all of the materials for the bag for around $20. I decided to take it really slow with this project. I had to castaway some of the anxiety to finish that usually takes hold in most of my projects. For this one I really wanted to do things the right way. Overall, working in small increments of time, the project took me about six hours.

I followed the pattern as closely as possible. The first part of the bag was fairly simple. I, however, couldn’t figure out how to  topstitch the sides of the bag. I’m 100% sure that it was just me overthinking it, but I couldn’t figure out how to topstitch when the sides of the bag are already sewn. I was like, “Well how the hell do I get this through the machine? What kind of witch magic is this?!” So I decided that I would topstitch the sides by hand. After starting, I realized that this might have been a bad idea. Hand sewing through vinyl is not fun. My fingers ached and I have NEVER been so thankful for the invention of the thimble (shoutout to the Romans or whoever is responsible for it).

36064766_10100311994612757_7080784179125813248_n

So the sides didn’t look the best, but I was pretty proud of myself for doing it. Will I ever do this again? No.

Once I got the body of the bag together I felt so accomplished. The inside of the bag looked pretty cool too. I even made a pocket:

35853406_10100311994662657_7878289267313606656_n

THE hardest part of the bag was the construction of the holes for the strap. I was so happy with the body of the bag that the idea of cutting holes in it terrified me! It took me two days to get up the gall to cut out those circles. Not only was it terrifying, but it  was hard to do. I spent a lot of time making and attaching the squares that make the holes and it ended up looking a little wonky. Regardless, I’m proud of myself for actually conquering my fear and making those holes!

The last thing I did was make the strap. This is another moment where I was faced with the fact that my machine – even with the leather needle – can’t push through so many layers of materials. So I hand sewed the parts of the strap that were too thick for the machine. I ran the strap through the holes, tied it, and celebrated.

36324360_10100314277907017_511408009407102976_n

I feel really good about this project and I feel empowered enough to try out making more bags. I definitely feel a lot more confident working with the vinyl. I would say that I will try real leather next time, but I’m a broke bitch. Maybe in the future when I finish grad school and have a job.

Ya girl made a handbag, y’all.


Fold-over Clutch…or, how I learned that I know nothing about working with leather

image8

Story time: I want soo badly to make purses. I know that I’ve got to start somewhere – so I went to Pinterest for inspiration. There are so many great purse patterns there. The only problem is that I can’t afford the materials to make most of them, so it took me some time to find my starter purse. On my Pinterest adventure I ran into this tutorial from yellow brick home – where Kim discusses making an oversized clutch on her second date with a sewing machine (for the sake of citation, Kim got the the pattern from Liz at Say Yes). Anyhow, I liked the pattern, and it felt similar to the makeup bags I had been making, so I decided to go for it. This is a story of how I tried, failed, and tried again. The picture above is the version of the bag that I’m happy with – but it’s more interesting to tell you about my failure first:

I was ambitious as hell. I saw that the original pattern used faux leather and I was all like “Why not? I used it on that laptop sleeve. What could go wrong?” I went out and got the materials: 1/2 yard of faux leather, interfacing, two fat quarters of fabric for a lining, and a zipper. I even decided to be bold and make a little strap for it, so I got some lobster claw clasps. I cut out two 16×17″ pieces of fabric and interfacing. I attached the interfacing and sat down to sew the zipper on. This is where I began learning lessons about working with faux leather.

  1. You need to use a heavy-duty needle. My original needle just wasn’t doing the trick. Luckily, I had some heavy-duty ones on deck.
  2. Leather doesn’t feed through the sewing machine the way other fabrics do. The first time I went through to attach the zipper, the zipper was really wonky (it was wavy). Apparently there are machine feet that can fix this problem – but I’m a broke bitch and that wasn’t an option. So I went about using my seam ripper to try it again. This led to my third lesson.
  3. You only get one chance with sewing leather. The needle leaves holes in it. Things can get ugly really quick.
  4. I’m not about this life.

So yes. The whole project was a fail. After I took it apart and tried it again (holes and all), it was better – but the zipper was still wonky. Here’s a picture of the atrocity:

It’s ugly, right?

Luckily, I’m not a quitter. After my first attempt, I was determined to do better. I noticed that Kim used vinyl instead of leather, so I went to Joann and picked up 1/2 yard of some really pretty green marine vinyl. I decided to NOT use interfacing (the vinyl seemed like it could hold its own). I also didn’t use a lining fabric for this one (no particular reason why). Lastly, I grabbed an 18″ metal zipper.

I cut out two 16×17″ pieces of the vinyl. Using the zipper foot of my sewing machine, I attached the two pieces to the zipper, then I pulled the zipper open a bit (to make flipping it inside-out possible. I then put the right sides of the vinyl together and sewed around the edges, making sure to clip the bottom corners. Lastly, I flipped that sucker inside out (right-side-out?), and it was done! The over-sized fold-over clutch was born!

Things went so well on this attempt. Making the whole thing took me maybe an hour and a half. I’m really happy with how it turned out.


A Felt MacBook Sleeve

Felt Sleeve

A few days ago I was desperately in need of a project to do. Because of #deadlines, I needed to find something to do that 1) wouldn’t take up too much time, 2) would be relatively simple, and 3) would be fun. So I decided to revisit something familiar: sleeves for the MacBook. In a post that I thought I posted a long time ago (but I apparently didn’t -so here is a severely backdated post), I explained how I started crocheting MacBook sleeves. They were pretty cool. I’ve carried mine around two years now, and it’s pretty worn. Anyway, I wanted to revisit making sleeves and I remembered that on my last haul at Jo-ann’s I picked up some green felt. I decided that I would use it to make the sleeve.

So here’s what I did (sorry there are no step-by-step pictures, but it really is so easy you don’t really need them).

  1. I used my MacBook to decide the size of the felt pieces. The sleeve is basically two pieces*.
    1. For the front piece, cut the fabric about an inch wider than the laptop on all sides. My MacBook is 11 and some inches by 7 and some inches (I rounded up the “and some inches”), so I ended up with a piece of fabric that was around 14×9. You don’t have to be precise. Eyeball it. Follow your heart.
    2. For the width of the back piece, cut the fabric about an inch wider than the width of the laptop like you did for the front piece (mine was about 14 inches). For the length of the fabric, cut about 5-6 inches more than the laptop size. Again, no need to be precise.
    3. TOTALLY OPTIONAL. I decided to get fancy and cut the back piece at a funky angle, to make the flap more fun. I also cut out a piece of faux leather fabric for the flap. Neither of these steps are necessary. I just felt fancy. Just know that if you go the fancy route, there are more steps that I won’t detail here.
  2. Sew the front piece to the back piece. To do this:
    1. Line up the front and back piece. The back piece will be longer than the front piece. Sew the front to the back by sewing around three sides: the left side, bottom, and right side. Leave the top open (at this point it will look like a sleeve – you can see where the laptop goes in and how the flap flops (a flap flops?) over the front.
  3. If my instructions were clear, you’re finished. It’s beautiful.

After making the sleeve you should feel like a rockstar.


*So what had happened was: I initially wanted to make the sleeve thicker by doubling the pieces of felt for both the front and the back. However, when I went to sew it my sewing machine was like “or nah,” and jammed up. I ended up spending a lot of time fixing the machine. If you want to do what I wanted to do, use a needle that is made for thicker fabrics. Maybe you can try a different foot for the machine, too? Shit, I’m new at this… I honestly have no idea.

Improving My Quilting Skills

Summer is a great time to procrastinateThis summer I spent a decent amount of my procrastination time sewing. I made skirts, a purse, and some makeup bags. One of my goal this summer has been to improve my sewing skills. This has meant improving my sewing, measuring, and cutting skills (I admit that I never realized how bad I am at measuring until I started this craft). This post is dedicated to my two favorite quilting projects.

FullSizeRender-2

I find bookshelf quilts so intriguing. They are absolutely fascinating. I want to make one so I decided that I needed to start small to see if this is really the life I want to be living. I searched through Pinterest and Google (which many times sent me to Pinterest), looking for patterns. I finally found Don’t Call Me Betsy’s Mini Bookshelf Quilt tutorial. Overall, the tutorial was easy to follow. One thing that’s different between my mini quilt and theirs is that I just couldn’t get the tilted book thing together – so I made three stacked books instead. Above is a picture of the top of the quilt before I attached batting and the back. At some point in the future (maybe after I get a job?), I will make a larger bookshelf quilt.

The second project that I really enjoyed making was a baby quilt. When I found out that one of my friends is pregnant I seized the opportunity to make a crib-sized quilt. I found a pattern at Cloud 9 Fabrics for a 5×5 quilt.  The pattern was SO easy to follow. It took me a little longer than I expected to make the quilt, but it turned out phenomenally. I gave the quilt to my friend when I saw her in Montreal and she LOVED it.

IMG_4798

From what I can tell, my skills are improving. I’m slowly getting better at this whole quilt life. Unfortunately, I will have very little time to even think about touching my sewing machine in the next few months.

Places to put my makeup

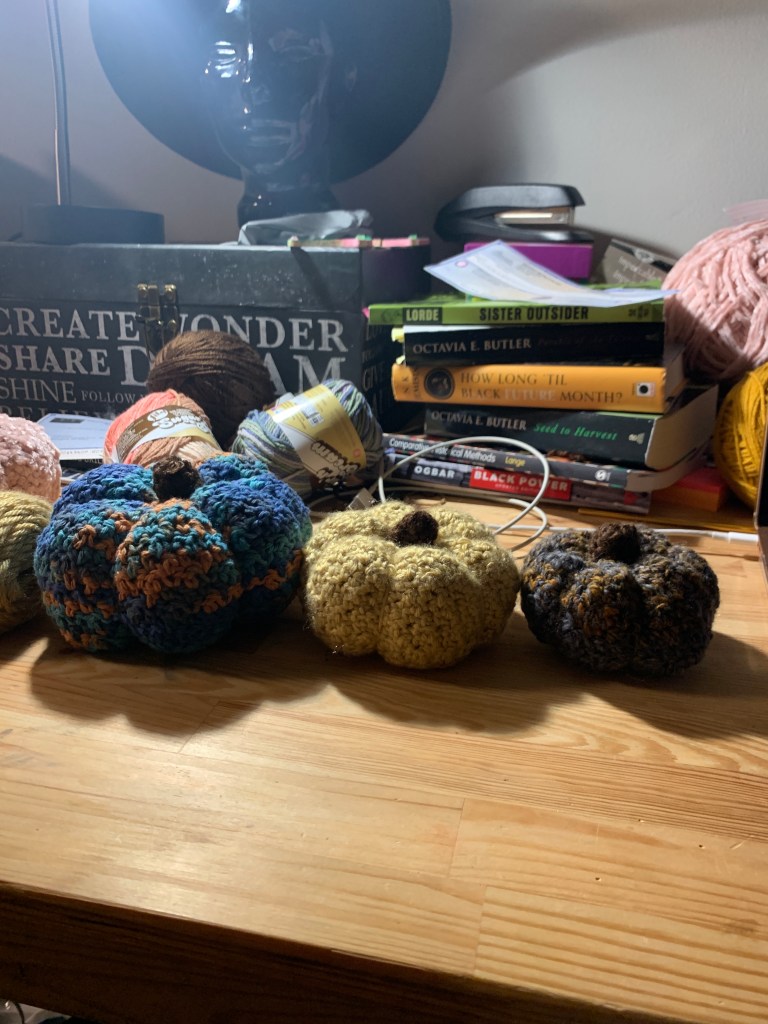
Since I started using my sewing machine (less than a month ago), I’ve been wanting to try out some things outside of quilting. One of the administrators in my department showed me a makeup bag that she made and sent me the pattern. I was instantly jazzed about the idea of making a makeup bag like the one in the pattern . So I got the fabric and all of the other materials and got to work following the instructions. I failed epically. Somehow I just couldn’t get the bottom to work, and the lining was weird, and how was I supposed to make the corners!? So I scrolled through the comments and that didn’t help. Finally, I got really frustrated and just cut the bottom off of the bag. I decided to just follow my heart and see where it (and my limited sewing knowledge) would take me. Here’s what I got:IMG_4007

Not too bad, right? After making the first one, I decided to make a second. The second one is the bigger one in the back. So at this point, I’m totally and completely absolutely excited. Check me out making something! I wanted to share it with you. So if you’re down, you can read step-by-step instructions for how to do this. This will be especially useful for newbies like me.

Step 1: Gather the materials

What you need for this fabric for the outside of the bag and for the inside. I used a fat quarter of the pattern with the keys for the outside, and about a fat quarter of some fabric I had left from my quilt. In case you don’t know (like I didn’t) what a fat quarter is: it’s a piece of fabric that is like 18×21″. You can buy them at Jo-Ann or Walmart. You also need some interfacing. Interfacing is this fusible stuff that gives shape to the fabric. I got mine from Jo-Ann. You need a zipper. Lastly, you need a ruler and something to cut the fabric with (I use a rotary cutter).

IMG_4012

Step 2: Measure and cut the fabric

Here’s the step where you get to choose your own adventure. You get to make your bag whatever size you want. You will need to cut the fabric a little bigger than you want the bag to be, since you’re going to be sewing the sides of it. I think I cut mine at like 10 1/2 by 8 1/2 or something close to that. I wanted it to be long enough to fit my longest brushes and tall enough to fit all of my misc items. You need to cut two pieces of fabric for the outsides of the bag, two for the insides of the bag, and two pieces of interfacing (all of the same size).


Step 3: Ironing on the Interfacing 

Once you’ve cut out the fabric, it’s time to hit the ironing board to fuse the interfacing. You want to make to to follow the instructions on your interfacing package. Mine is fusible on both sides, so I had to iron with the interfacing sandwiched between the outside fabric and the inside fabric. As you can see below, I have the outside of the fabric on top of the interfacing, with the inside fabric on the bottom. If your interfacing is only one sided you should scroll down to the bottom of this post for what to do.

IMG_4017

Step 4: Sewing on the Zipper 

Now is the point where we start sewing on the zipper. With the fabric side up, pin on the zipper with the zipper side face down. Make sure to line up the end of the zipper with the edge of the fabric like how I have in the picture (note that my zipper is super long. Your zipper doesn’t have to be so long – I was worried about not having enough zipper). Now that it’s pinned to the zipper, it’s time to sew it on. What I did was sew it with the zipper side down, and then sewed down the zipper on the other side. Next, I did the same thing with the other side.


Step 5: Sewing the rest together 

Our next step is to sew together the rest of the bag. The first picture below is what the outside of the bag should look like so far (it looks a little wonky in my picture, but I promise that it isn’t uneven). Unzip the zipper about 1/2 to 3/4 of the way down and flip it over so that the inside part is facing up. Fold it in half with the inside part on the outside like in the picture. Sew around the three sides. Because my zipper was so long and I didn’t feel like cutting down the zipper, I hand sewed it to the side. The bottom right picture is what it looks like with all three sides sewn and the zipper sewed down.


Step 6: Flip the Bag Inside-Out

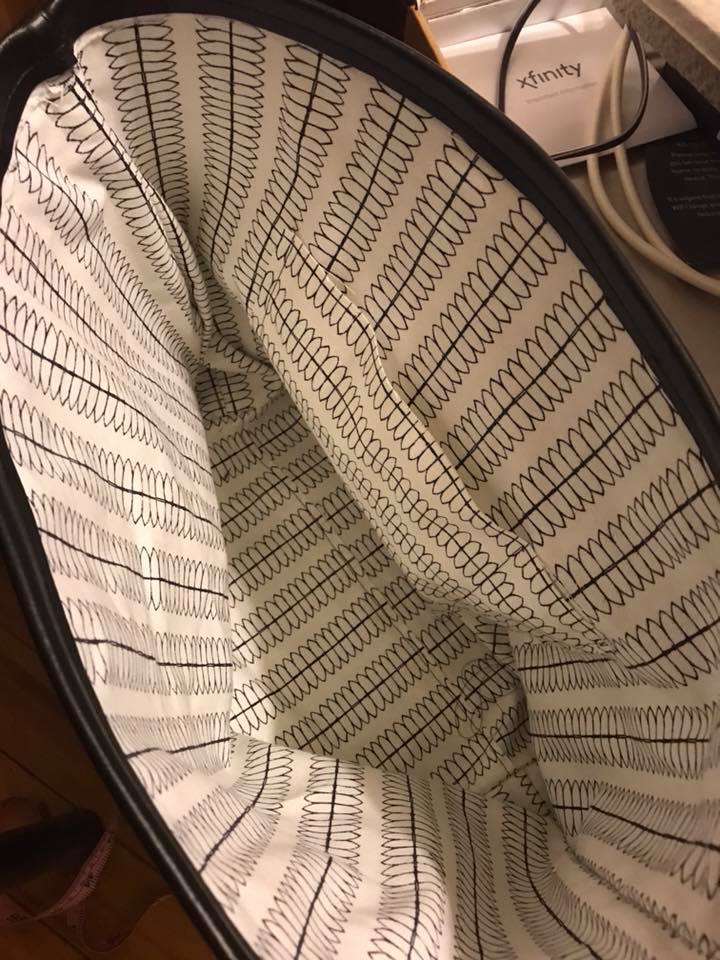
This step is pretty simple, but not extremely easy. Because of the interfacing, it can be a little more difficult to pull the bag inside-out through the part of the zipper that was left open. Just keep at it until it happens. I believe in you.

IMG_4027


Step 7: Celebrate!

We did it! We did it! Once you’ve made it to this step you are a winner and the world is yours. If you’re as jazzed about this as I am, you probably feel like you hung the moon. That’s how you feel, because you’re amazing. Below is a picture of what the final bag looks like:


It’s not perfect. It’s a work in progress. Aren’t we all, though? In the meantime, load it up with makeup or whatever you see fit!


Quilting

It’s been a while since I last posted, but remember my sewing machine adventure from November? In the time between then and now, I have become absolutely obsessed with sewing. I have thought, dreamed, and plotted on how to get started. Because I was initially brought into the sewing life working on a piece of a quilt, quilting seemed like a good place to begin my journey.

So here is how it happened: a professor in my department, seeing my enthusiasm about the original quilt square, told me that she would teach me how to quilt. She invited me to a quilting club meeting. The club often makes quilts for various causes and they were currently making quilts for a local midwife. The professor offered to teach me to quilt using the fabric she got for the midwife project – and I, of course, said yes. So we met at her house and she showed me how the quilting magic happens. After six long hours of measuring and cutting fabric, ironing, and learning to use the sewing machine, this happened:

Quilt1
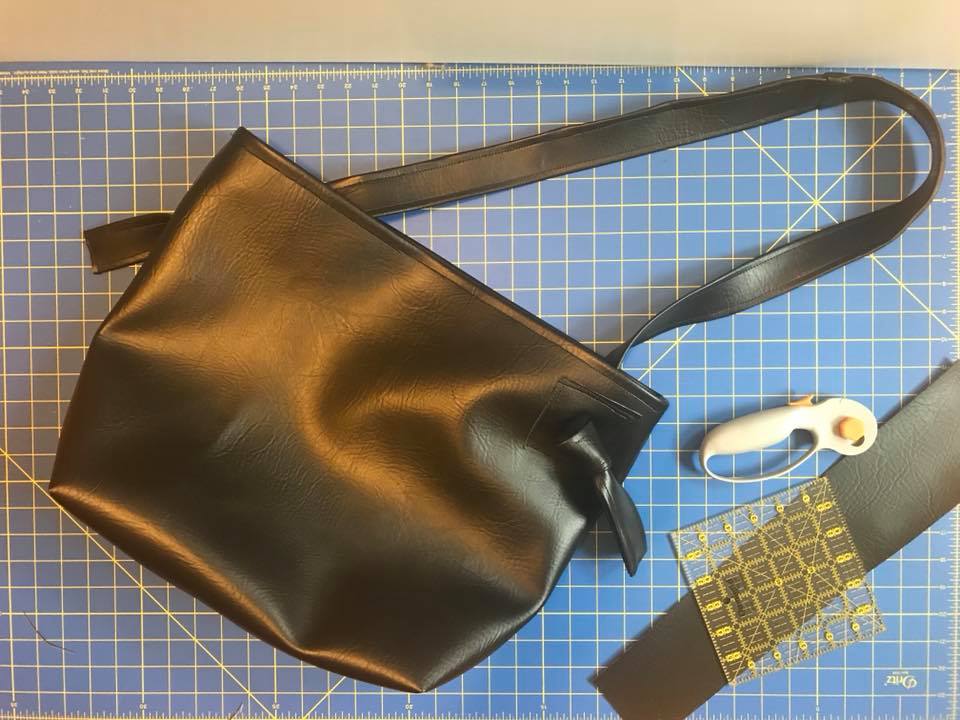
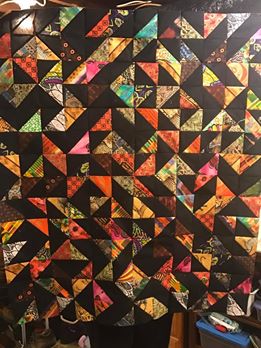
Isn’t it beautiful? Not too bad for a first try, right? This took A LOT of help. So much measuring. So much ironing. SO much learning to use the sewing machine without breaking it! Ok, so here’s a quick breakdown of the process:

  1. Cutting the fabric into the desired size squares. I think that our squares are 3 1/2 inches.
  2. Sewing the fabric together.
  3. Ironing a lot. Like a lot a lot. I don’t remember how much. Just know that it is a lot.

Ok, so that was day one of the process. Day two was attaching the back and hand quilting. Here is how that went:

  1. Cutting a piece of fabric that is the same size as the front.
  2. Cutting some batting that is the same size.
  3. Sewing together the fabrics with the batting in the middle.
  4. Hand sewing (this is what makes the lines and designs that you see in a quilt).

The hardest part of day two was hand quilting. I pricked my fingers too many times to count. I realized that I need to grow out of my soft baby hands to be a quilter.

The night of day two was SUPER interesting. Did you know that there are lectures done about quilting? We went to a lecture by Dr. Carolyn Mazloomi. Dr. Mazloomi gave an amazing talk about African American quilts. It was absolutely fabulous. She showed examples of quilts from her exhibition and book And Still We Rise. If I tell you that those quilts were some of the most beautiful things I’ve seen in my 28 years of life on this planet, would you believe me? You should. They were amazing.

So after all of this quilting amazingness, I realized that I am now about the quilting life. I decided that I wanted to make my own solo and completely unsupervised quilt:

Quilt2

Isn’t it beautiful?! I think that I did a really great job for my first quilt. It’s 32×36 inches. It took me about 2-3 days to finish it. Not going to lie to you, it was a lot harder doing it on my own – especially the measuring. Here’s how it happened from start to finish:

  1. I went to Jo-Ann fabrics and bought fabric. I also bought a ruler, a rotary cutter, a cutting mat, quilting thread, some batting, and a seam ripper.
  2. I went to Walmart and bought my very own sewing machine. I got a Singer Simple. It said simple on the box so I figured that they had me in mind when they made it.
  3. I washed the fabrics.
  4. I went home and started measuring and cutting. This part took about a day because I learned that I’m not really good with measuring or cutting in straight lines.
  5. I sewed the pieces together. That part was simple (thanks to my simple sewing machine!).
  6. At some points I ironed a whole hell of a lot. I don’t remember when – just know that it happened, that it happened a lot, and that I hated every moment of it. If you haven’t realized by now – ironing is one of my least favorite activities.
  7. Once I got the whole front piece together, I cut out and sewed and ironed the back piece.
  8. I cut out the batting to the same size as the front and the back and then went to town sewing the three layers together.
  9. Lastly, I hand sewed. To do this I used a washable marker, a dish, and a bowl. I outlined the dish and the bowl in patterns around the blanket and used them as outlines for the hand sewing. I hand sewed my little heart out. I poked myself a multitude of times – but I didn’t give up. I stand as a testament of how you can survive multiple needle pricks and not give up on sewing.
  10. Once that whole situation was finished, I washed the quilt.
  11. Lastly, I admired my work, took mad pictures of it, and posted them to Instagram and Facebook. I wanted everyone to know what I have accomplished.

Now, I sit here writing this blog post, thinking about how much my niece is going to love this quilt. I can’t wait to make another one. I absolutely can’t wait.